Monday, January 16, 2012

Woo Hoo! ATC's With Melissa Samuels and an ATC Challenge!!!

Hello Everyone:)

How did I get here again so soon!
LOL!!!
Yes, it was just yesterday that I did one of the
largest blog posts I've done in a long time,
but with the Fun Giveaway Announcements,
and all the Wonderful Eye Candy I had to 
share, I wanted to get it all listed before
Todays Fabulous Blog Post!!
(So if you have the time, and a cup of coffee settle in
and have a Boo!:)

I'm so very pleased, as it's been a little while, to share with you todays blog post is with my Dear Friend

Melissa Samuels


Melissa asked me back in December if I would be interested 
in doing some ATC's for a blog post 
Featuring her Shop's
Great Selection of ATC Products and Accessories.
No Problem!!! I love ATC's!

In case you don't know what an ATC is, 
here is my knowledge on the subject. 
An ATC is an 'Artists Trading Card'.
Artist Trading Cards are for the sole intention for 
trading with other artists, and are not for sale.
There are a plethora of websites on the Internet just for the fun of making and trading ATC's! 
And, I believe the only rule in making ATC's is that they 
are to be exactly 2 1/2" wide x 3 1/2" long.
And that's the only rule!
You can use any medium in art you wish to make 
an ATC, as long as you have them the correct size!


Well I have to tell you.
Melissa  has a Wonderful Full Product Line of
anything you might need for making ATC's!


With a Full Selection of Inkssentials Brand
Artist Trading Card Blanks in a huge selection 
from Card Stock Blanks to Black Chipboard
and everything in between!
(Tags too!:)

Melissa so kindly sent me a selection of the 
Inkssentials Brand Blanks and other Products
for making Todays Project:)
And Scor-Tape too!
I hadn't seen the Scor-Tape before in such great
sizes, from 1/8" all the way to 1/2" and above!


And look at all these Fabulous Embellishments!
Woo Hoo!!
Everything from Prima Brand Shabby Chic Treasures,
Melissa Francis Brand Vintage Embellishments,
Websters Pages Sparklers, and even
My Mind's Eye Lost and Found Pad 
of 6x6 Papers
in all the colours I'll be needing, 
as today I'm making 
Valentines Day related ATC's:)

So lets get to it!

The ATC's that I'll be showing you, are all
going to be 3 Dimensional as that is my 
very favourite kind of ATC.
Because I enjoy making Mixed Media 
Altered Assemblages when I can find the
time, I tend to enjoy in other mediums
building layers. So any of these ATC's
I'm showing you today, are just 'my' thing.
When it comes to doing your own, 
do your own favourite type of ATC, 
paint, draw, cut and paste,
staple, sew, glue,
whatever you chose:)

Using the wonderful 6 x 6 pad of 

My Mind's Eye Paper that Melissa sent me, 
I covered the Inkssentials Blank ATC with
paper using the Scor-Tape to secure the paper.
These lovely papers come double sided and 
I kept in mind that the other side was complimentary
to the print on the front, so not to waist the paper,
I would cut a piece for the front, then flip and cut
a piece for the back of the ATC. Always do the 
backs of your ATC's as that is where you'll be 
signing and dating your ATC's for Trading them!
I also chose in this example a
Melissa Francis Brand 
Vintage Embellishment Frame and 
Prima Brand Shabby Chic Treasures Corners.
I had the Red Heart Button and chose a vintage
music sheet to back the frame 
with to offset the button.
Melissa also sent a lovely bag full of 
samples of all sorts of beautiful 
lace and ribbon trims that she also 
carries in her shop! 
Paper flowers, and lovely Pins too! 
(Yummy and so much fun!! LOL)

In this example
the double sided paper had this lovely
graphic of a pair of birds on the other side,
you'll see in the finished ATC pictures what
I did with it:)
I like to use Ranger Brand
Inkssentials Glossy accents to attach my
3D Embellishments as I think it helps
them stay on the card stock well.
And I also always edge my ATC's with
Tim Holtz Distress Inks to give a 
Vintage Edge to my ATC's.

So that's the basics of how I made the ATC's
in Todays Blog Tutorial!

Thanks to all of you for checking in!
wait....what am I forgetting.....
oh yeah...


(grin)

Like I said before, these are just suggestions
of some 3D ATC's 


and everything you see on these examples
you are able to find in Melissa's shop
at
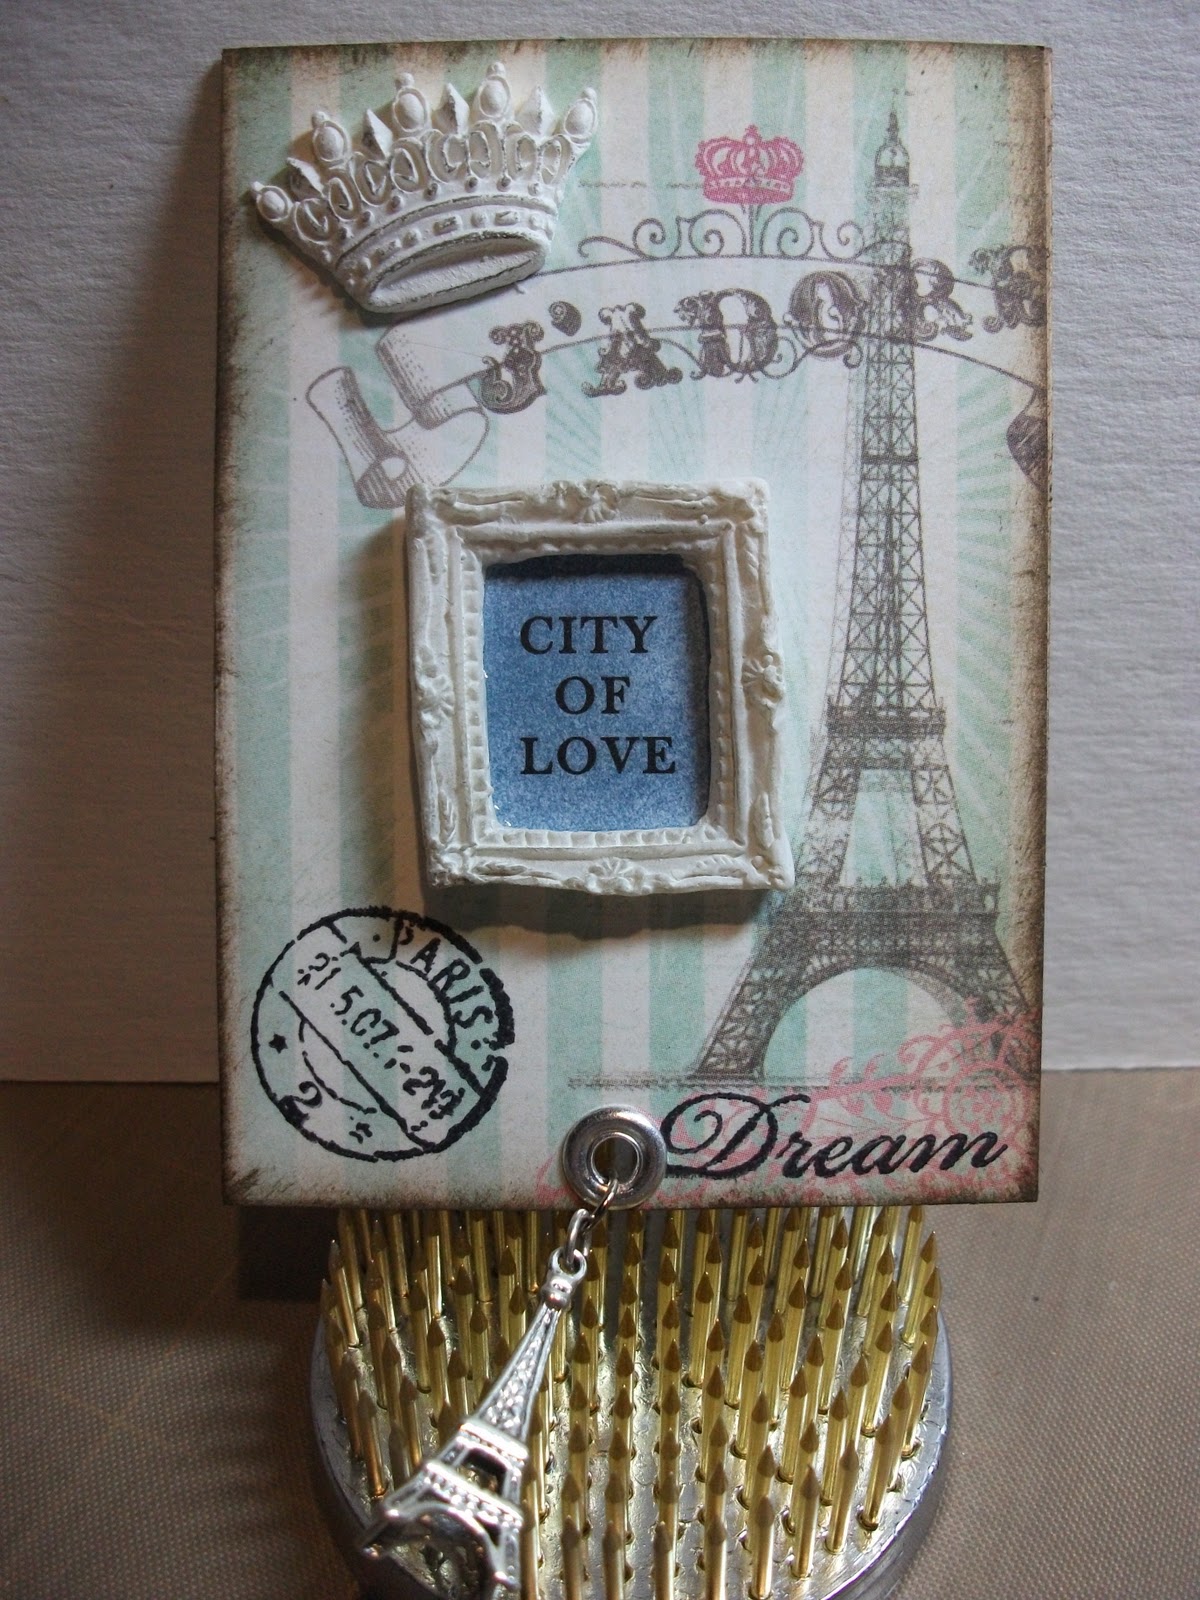

(except this little charm, that was mine, LOL)


And as you can tell these are all about...


Valentines Day:)


So I really hope you all will consider making 
some ATC's or get back into making ATC's!
And check out Melissa's Great Selection of Products 
to get you started and/or back into making them!
Matter of fact.....while I think of it....

Here's a little idea:)

I made 5 ATC's for this Tutorial 
if you all might be interested,
and to encourage you to get into making
your own ATC's:)

Leave a Comment on this Post
(and sign on as a Google Follower if you 
aren't one already:)

And on Tuesday, January 24th, 2012
I will pick 5 Winners to send these ATC's to:)
But here's the catch!

The 5 Winners have to make 
1 Valentine's related ATC
of their own to mail back to me:)
When I have received all 5 of your ATC's
I will post them here on
Birdnuts Mixed Media's Blog
to 
Highlight Your ATC's!

Please do leave me a Comment anyway as I always
appreciate hearing from you all, but Highlight
in your Comment if you're throwing your hat in 
for the ATC Challenge!!!
Woo Hoo!!!

I'll Announce the Winners 
in the Challenge
on Wednesday, January 25th, 2012!
And send you an email for your mailing information
to send you one of the Tutorial ATC's!

Big Thanks to Melissa Samuels
for all the Fun Goodies she sent to me
for the making of these ATC's!

Now get to making your ATC's!!!

ENJOY!!!


Sunday, January 15, 2012

We Have 3 Winners!!!

Woo Hoo!!!!
3 WINNERS!!!

Hello Everyone!!

Well here I am, about to announce the
Winners of the 3 Tutorial Brooches
I made for 
Shabby Cottage Studios
for my 1st Tutorial as
Artist in Residence:)

I had great fun making these brooches,
and I'm so very pleased to be sharing them,
with at least 3 of my Fabulous Followers!
I just wish that I could give every one of you one!

And the Winners are!!!

Marilyn (Tarnished Rose)!
and
Cindi a.k.a. Erickson!
and
Selah Gay!!

Woo Hoo!!!!!

I will be sending each of you an email to notify you
that you are a Winner, and request that you send
your mailing address to me in return confirmation, 
for me to mail the brooch!
I will say, any addresses that are supplied in any
of my Giveaways,
 I will immediately delete upon use, 
and not keep in future or share in any way
with anyone else, as to protect your privacy:)

Woo Hoo!!! Winners!
I was so pleased that so many of you were interested
in Entering the Giveaway for the Brooches
and have decided that in future Tutorials for
Shabby Cottage Studios
I may again offer the Tutorial Project
in a Giveaway again!
Stay tuned as in the coming weeks 
as I will be posting the next 
Tutorial for Gail at Shabby Cottage Studio,
as in the meantime,
I also have other Projects and Giveaways
with my other Fabulous Company's 
I have been so proud to be 'Friends' with!

As I will be tomorrow,
Monday, January 16th, 2012
There will be a New Blog Post
with a Fun Project for
That's right, an ATC Project for
Melissa Samuels
Tomorrow here on Birdnuts Mixed Media!

Wow, what a morning!
3 Winners of the Brooch Giveaway
and an upcoming New Project tomorrow!
So in the meantime....

I'd like to take a few more minutes of your precious time,
to share a few 
Shout Outs, Projects, and Eye Candy,
 while we wait for tomorrow's new Blog Post:)

The Holiday Season may be a Past Memory 
for most of us, but it's been still going on
for me here in Victoria, B.C. long after
the Holidays were over, as my mail service
has been so backed up, that packages are
still arriving for the Holidays!
I'd like to Share with You all a couple of 
Lovely Goodies that have arrived and
tell you a bit about the senders:)

Ms. Gigi Butterfly here in Beautiful British Columbia!
Sent a Fabulous Print to my Husband and Myself
From her Fabulous Gallery here in B.C.
I would love for you all to check out her Online Gallery @
www.GigiButterfly.com
And see so many of her Wonderful Art Prints!!!
Thanks so much for your generosity Gigi!!!

and I also would like to share with you another
of my Fabulous Artist Friends
Sherry Westfall Mathews
Sherry makes these Adorable Creations
and lists them in her Etsy Shop at
dalaimomma@etsy.com
I absolutely love this Vintage Watch Creation
that Sherry made! The snow works just like a 
snow globe:)
Hugs to you Sherry! Adore it!!!

And I am just so overwhelmed this last Holiday Season,
as so many of my Incredible Artist Friends
so many of them on Facebook 
(and what a Fabulous Community of them there are!!!)

My Dear Friend
Mary Jane Chadbourne 
of
Desert Dreams Studio
on Facebook
Mary Jane makes a Variety of Handmade
Incredible Bracelets, and Art Boxes and
also sells on Etsy to boot!
DesertDreamsStudio@Etsy.com
I Love the Bracelet Mary Jane!!
Thank you so much for making it for me!!!

And I also have to absolutely tell you about
my BIAF!
(Best Internet Art Friend)
You all know her as
Kristin Hubick 
of Retro Cafe Art Gallery:)
Among the many things that Kristin so very kindly
sent me for my Birthday in December and the Christmas Holiday,
for which I am so 'gobsmacked' with, this had to absolutely
take the 'cake' so to speak:)
Kristin at Retro Cafe Art Gallery 
made arrangements with the Fabulous
Debrina Pratt of
Land of Enchantment
to send me one of Debrina's Fabulous 
Art Creations that I just adore!!!
Kristin knew that I have always wanted one
of Debrina's Lovely Creations and made
arrangements that both she and I would
have our own Birdhouse's made by Debrina!
As you all know, 
Retro Cafe Art Gallery
sells a Beautiful Assortment of
Land of Enchantments
Wonderful Graphics Sheets!

These are just a Fabulous Assortment of what I call
LOVE
From all these wonderful Artists who I am so proud
to refer to as my Friends:) :) 
Love you all!!!

And wait there's more to share!!!!
(LOL, Longest Post Ever!!! LOL)

I signed up this last December for a Fabulous
ONLINE TUTORIAL CLASS!!!!
AND IT's FREE!!!!

With my Fellow Canadian Artist Friend
Effy Wild of
www.wildpreciouslife.com
Book of Days!

Please check out Effy's Wonderful Project that I am 
currently a Group Member of as it's a Wonderful Opportunity
to learn all about Journaling, and be Motivated by this
Wonderful Artist!
It's a Year Long Project! Which may sound intimidating, but it's a Fabulous way to keep motivated, and the 
Online Community on Facebook as a Group Member is 
a 'Happening' in it's support!!
Here's some examples of my journal pages I've created while
being a Member of Book Of Days...
Trying all sorts of techniques! From Watercolour Washes,
to Stamping, Hand Lettering, and Graphics use!
(Graphics from the Fabulous TumbleFish Studio @
DeviantScrap.com!)
And of course as many of you Followers have learned
I always have a bit of cheeky humour in my pieces:)
(Big Birthday Sock Bash for my December Birthday:)
And I've even been motivated by Effy's Class
to dig out my old Acrylic Paints from my
years of Decorative Painting and begin again
doing some of my own creations through Journaling:)
(This page spread is going back to my sort of 
'childs book' ideas, back when I thought I'd be 
writing children's books. Old dreams anew:)

So Everyone:)
A very long blog post, full of Eye Candy:)
And tomorrow another post with the
Fun and Fabulous
Melissa Samuels!!!

And again,
Congrats to the Tutorial Brooch Winners!!!

Enjoy!!!!


Wednesday, January 4, 2012

My Dance Card is Full This New Year!!! 2012!


Wow!
2012!!


Well Hello Everyone:)
Here we are in the New Year
at the Beginning! 
And boy is my
Dance Card Full!!!
So get your Dancing Shoes on,
as we're going to be really
busy for the next couple of months! LOL!

First off, I hope all of you had the kind of
New Year's that you all were hoping for!
I had a wonderful quiet one which was what 
both I and the husband were hoping for! 

Now, this month of January is going to be 
broken up into 3 parts! There are Giveaways and
Contests and lots of Fun ahead with some of
My Favourite Internet Shops!
So Let's Get This Party Started!!!

I Have Big News!!!
And I am So Honoured!!!
As many of you know, 
Gail Schmidt 
of
Has been a Long Time Friend here
on Birdnuts Mixed Media.
Gail's Wonderful Shop and Blog and
Internet Studio of Tutorials
by Fabulous Artists and by 
Gail herself, 
as she's a Fabulous
Artist and Digital Artist to boot!
Her shop has been a long time source for me for
all sorts of Wonderful Products and Digital Graphics.

A while back, 
Gail asked me if I would be interested
in a project with 
So for the past month or so, we've been 
working on this project.....


YIPPIE!!
I am dipping my toes into the water as
A Team Member
Artist in Residence for

I was Gobsmacked when Gail asked me to 
come on board as a 
Member of the 
Shabby Cottage Studio Team!

So for the next few months, 
I'll be doing a 
Blog Posting Once a Month,
Highlighting a Tutorial 
done by Me, 
using some of the 
Fabulous Shabby Cottage Studio
Products that Gail has to offer!

In turn, Gail will be
Posting Links on her 
Blog
and in her Newsletter
and in her 
on her Web Site
to Highlight My Tutorial!

So lets get started as there is so much to tell you still!!!

My First Tutorial as
Artist in Residence
for
Shabby Cottage Studio:)

Inkssentials Brand
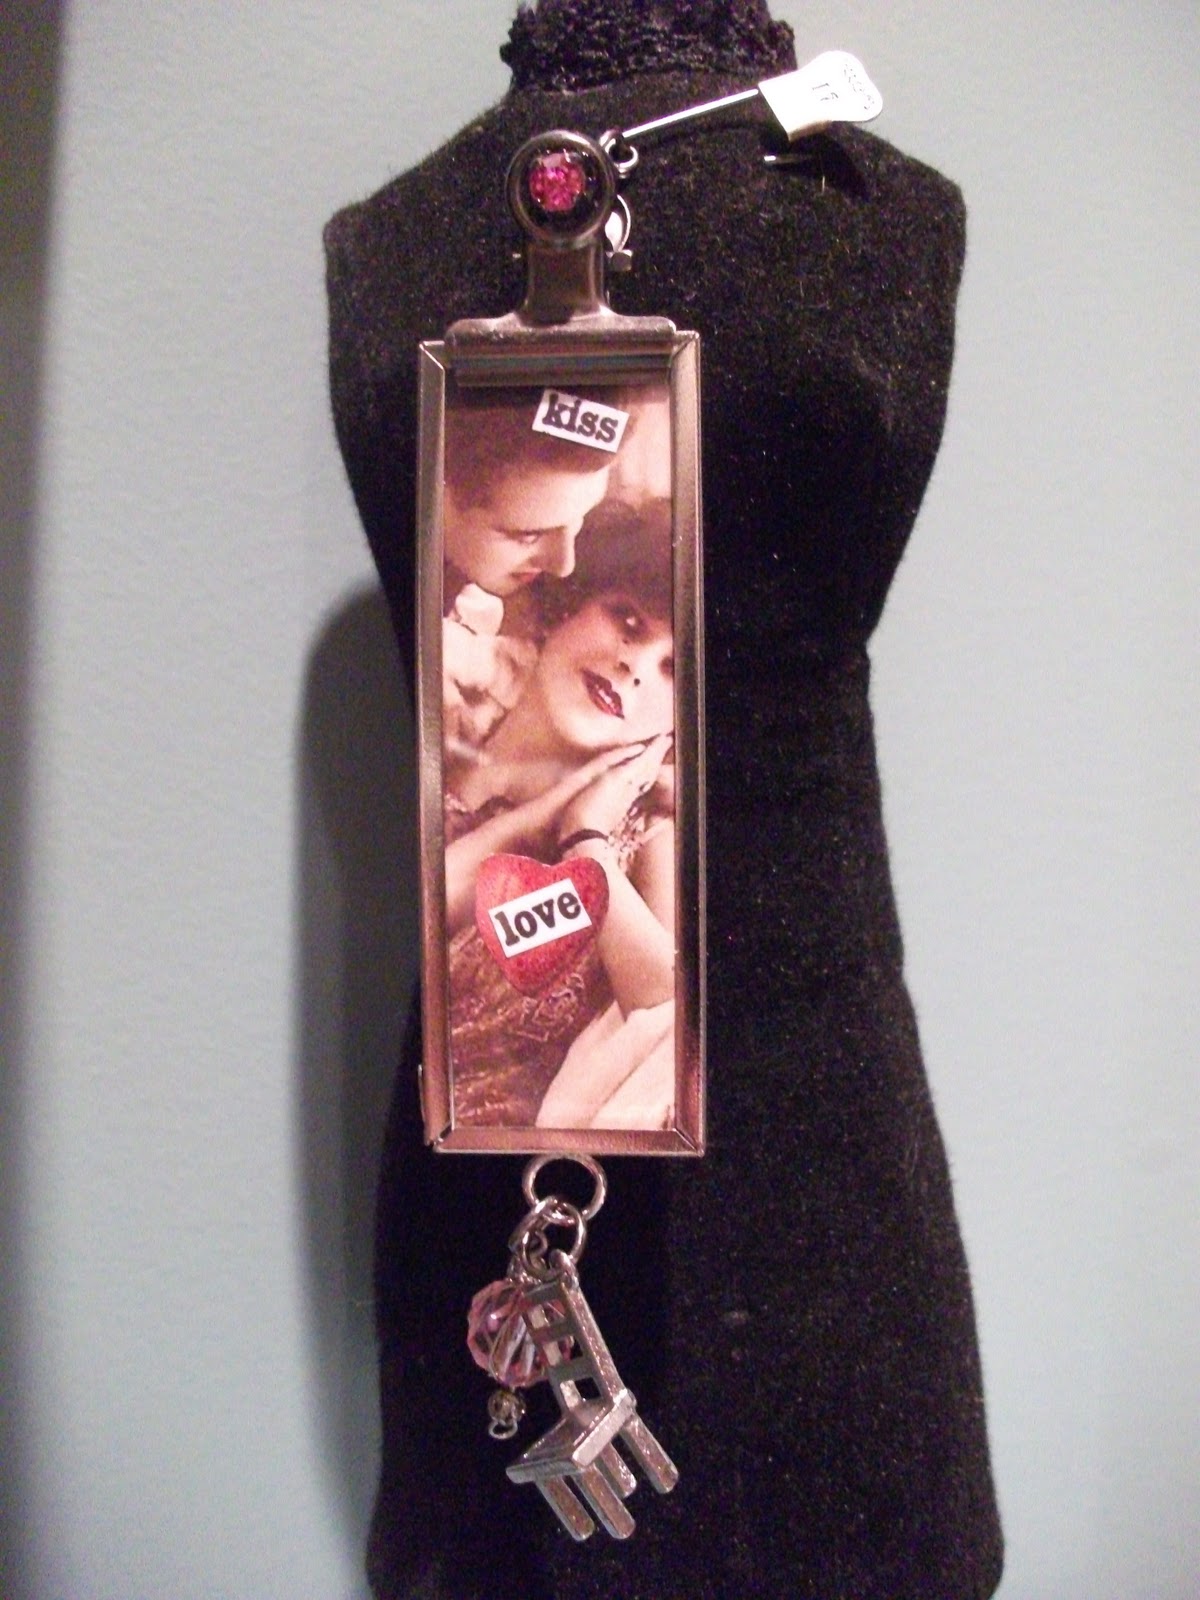
'Memory Glass Framed'
Brooches.


For this tutorial we'll be using 
Inkssentials Brand 'Memory Glass Frames' and 
Inkssentials Brand 'Memory Glass'


I'm going to show examples of my brooches
in 2 of the sizes that Gail offers in her Shop
1 x 3" inch and 2 x 2" inch sizes.
They come in 3 different colours,
Black Patina, Antique Copper and 
Polished Chrome.
There are tons of ideas for use of these frames,
but in this tutorial I'll be making my brooches
hoping to inspire you to come up with even
more ideas on their use!!


Other items I'll be using in this tutorial
from Shabby Cottage Studio are
some of Gail's Assortment of
Tim Holtz Products like his
really cool Clips and Trinket Pins, Jump Rings
and even the Fabulous Ranger 'Stickles' Glitter
that Gail has a selection of!


I will also be using some of 
Shabby Cottage Studios
Assortment of 
Charms and Metal Embellishments

Joker Brand Metal Chair Charms
and 
Vintaj Brand 'Diamnond Filigree 2 Hole Connectors'
and
Blue Moon Brand 'Lost and Found' Cage-Pink Beads

And of course I'll be using 
Gail's Fabulous Graphics Sheets!!!


She has a HUGE Assortment of
Wonderful Graphics for a plethora
of uses!!!
For making these brooches, I printed 
Gail's Wonderful Graphics 
on Card Stock so as to get the proper
thickness for fitting into the frames with the glass.


In this instance, I chose to use Gail's lovely
Body Form Tag Graphics, as I thought they
would lend themselves to a great 
Valentines Day Project:)
I sized up the Graphics Sheets using an empty
Inkssentials Frame, then when I figured out
the particular part of the Graphic that I wanted to use, 
I cut it out to a 1 x 3" piece in this circumstance,
and a 2 x 2" piece for the other size frame:)


Once I had the pieces cut, 
I used the Ranger 'Distress Stickles' Glitter
with a small paint brush to the areas
that I wanted to highlight:)


And as you can see, I didn't stop there!
Add lots of cut out pieces from the other Graphics
and some words, and even use some of your stamps
to embellish the graphic with layers to give it 
even more interest:)


Once you have your Graphics Cut-Outs ready,
pop them back to back, yes that's right there are
two sides to each brooch!!
Sandwich them in between two pieces of the
Inkssentials Memory Glass
then slide them into the Frames.
(Quick Tip:)
Be careful as it is glass that you're handling, so 
make sure you have a clean work surface, that 
not only will help keep the glass clean, but also
in case it breaks or any shards chip.
I always keep a package of Baby Wipes on hand
to clean the surface occasionally just in case:)

Now once you have your Graphics and Glass
into each Frame 
turn the frame upside down with the ring at the bottom:)
Attach a Tim Holtz 'Clip to the top of the frame,
( I added a loose rhinestone to the clip for a little extra bling:),
and using a Tim Holtz Jump Ring, attach
a Tim Holtz Trinket Pin to the Clip:)


And again using the Tim Holtz Jump Rings
attach some of Shabby Cottage Studios
Wonderful Charms and Beads:)

For those of us who do not solder....
(YET!)...


these can be a Fun and Interesting way
of making some 'Bling' for ourselves or
as gifts for others:)


You can also turn them the 'right side up'
with the ring at the top to use a jump ring
and use a chain for making into a 
creative necklace as well:)


So in Honour of Gail Schmidt
and 
giving me this 
Wonderful Opportunity 
as
Artist in Residence

I'd like to Give all of You
Chance to Celebrate 
with me!

Sign on as a 
Google Follower
here on my Blog
and on
Gail's Blog at 
and
Leave a Comment on this
Tutorial Post
and on 
January 14th, 2012
I will pick 3 Winners 
to be Announced
on 
January 15th, 2012
to send these 
 Brooch Examples to!
Please make sure you have your
email address in your 
Comment on this post so
I can contact you for mailing
information as a 
Winner 
of one of my Brooches:)
also
make sure you sign on as
a 'Follower' on Gail's Blog Post
as well as sign up for her
Fabulous Newsletter so you'll
get to see all her updated 
Shop Information and her
Wonderful Freebie Graphics too!!

Well There Ya Go!
Yippie!!!
So please sign on and get 
Entered for the Giveaway on January 15th, 2012!!
And as I mentioned before there's lot's more coming
later this month with even more 
Giveaways and Contests with More Fabulous
Internet Shops!!

Enjoy!!!